Project Groups: Dependencies Between Projects
A project group consists of two or more sub-projects. Project groups are useful when dependencies exist between projects — for example, across different departments — and each project may be managed by a different project manager. You can represent these cross-project dependencies in your project plan by adding other projects and creating a project group.
To create project groups, you need Edit Projects and Edit Planning permissions — either through your individual global permissions or your role within the project. Users with read-only access cannot use this feature. Permissions are managed in the user and role permissions settings (administrator rights required).
Create a Project Group
- Open the planning of an existing project, or create a new project and navigate to the planning section.
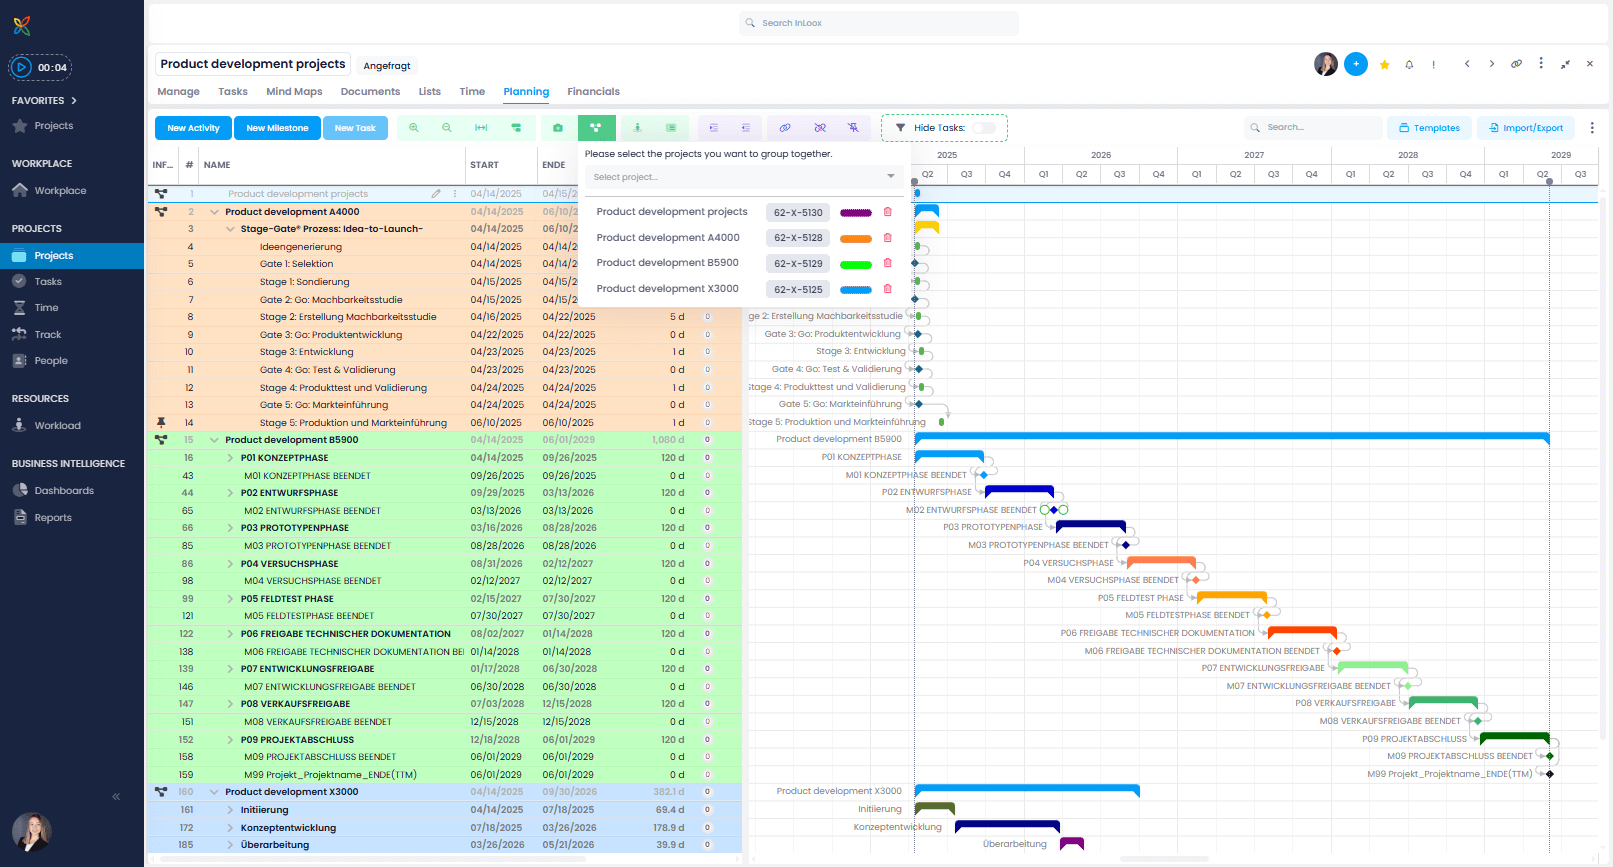
- In the navigation bar, click the Project Groups button.
- In the window that opens, select a project whose planning you want to include, or use the search function.
- The selected project's planning is loaded into the current project plan.
You can identify a project group by the icon shown in the Info column.
Project plans are visually separated: all elements of each project are highlighted with a specific background color. You can customize this color by clicking the color bar next to the project group.
- Add as many project plans as you like: search for the desired project and click on it to add its planning to the current project group.
Create Dependencies Between Projects
You can edit the project plan as usual. Changes made in a linked sub-project are also reflected in the original project.
To link individual project plans, create dependencies between planning elements across different projects. This works the same way as creating dependencies within a single project.
If you do not have editing rights or an assigned role in an added project, you can see it but cannot edit it. If you lack read rights for a sub-project, it will not be displayed.
Remove Sub-Projects from a Project Group
- Click the trash can icon next to the relevant project in the Project Groups window.
- Confirm the removal by clicking Delete.
Each sub-project remains available in its original project. Sub-projects are not deleted — they are simply removed from the current project group view.