Print Project Planning
To print a Gantt chart in InLoox:
- Open a project in InLoox Web App and navigate to Planning.
- Click the three vertical dots at the top right, then click Print.
- The print settings open with various customization options:
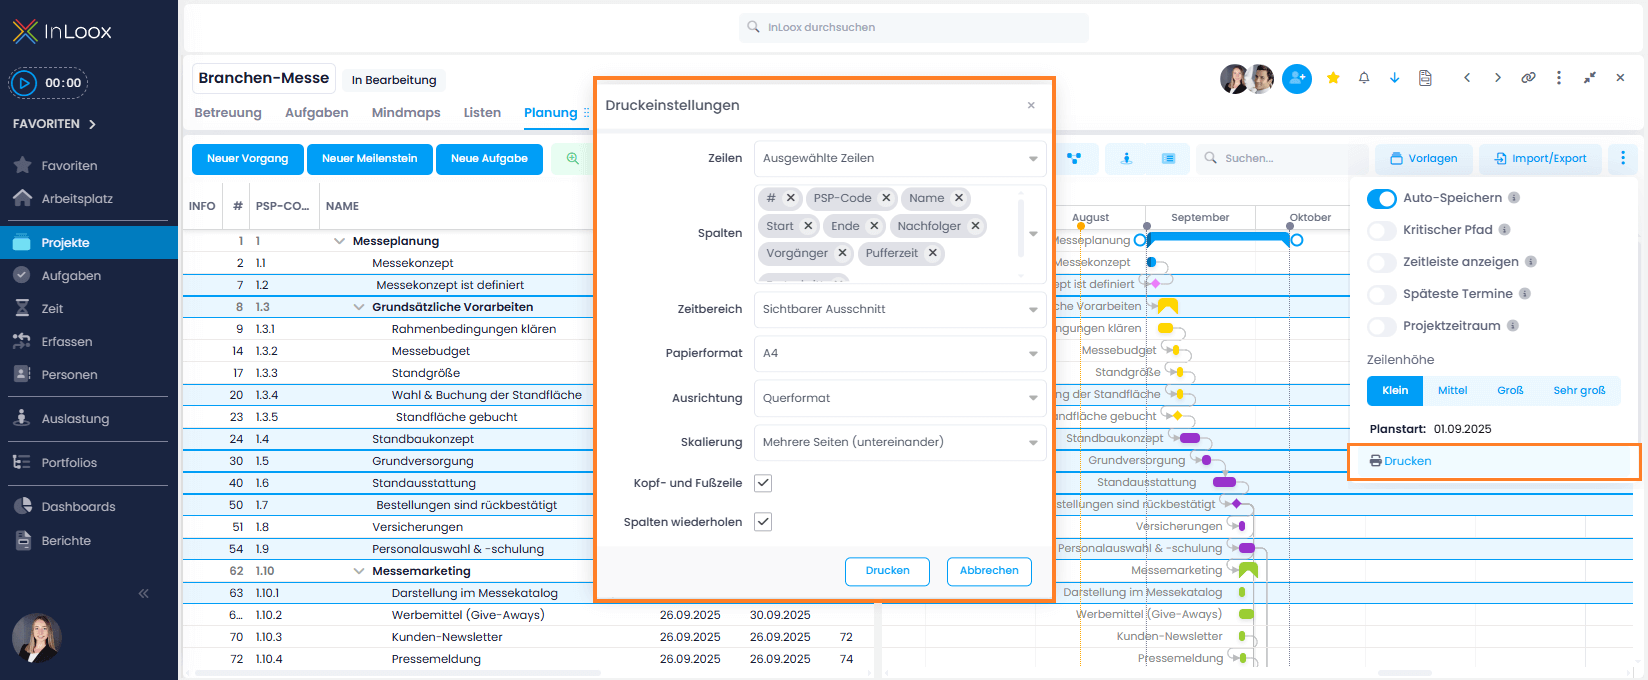
Rows
- All Rows — Prints all activities, summary activities, milestones, tasks, etc.
- Selected Rows — Prints only elements you've selected beforehand in the Gantt chart.
To select multiple planning elements, hold down the Ctrl key.
Columns
You can remove columns from the printout using the x next to each column name. You can also add more columns by typing the column name in the field and selecting from the dropdown.
Date Range
- Complete range — Prints the entire schedule. Note that print size may be quite small for extensive schedules.
- Current view — Prints the section currently visible in the Gantt chart. Use zoom buttons or Ctrl + mouse wheel to set the visible area.
- Custom — Select a specific time window with start and end dates.
Paper Format
Choose from: A6, A5, A4, A3, A0, Legal, Letter.
Orientation
Select Portrait or Landscape format.
Landscape format is usually more suitable for Gantt charts.
Scaling
- Single page — Prints all content on a single page.
- Multiple pages (side by side and stacked) — Splits the chart across multiple pages both horizontally and vertically, creating a grid of pages that form the complete diagram. Useful for extensive charts with many activities and a long timeline.
- Multiple pages (stacked vertically) — Divides the chart vertically (by list of activities) while keeping the horizontal timeline on each page. Ideal when you have many tasks but the timeline fits on a single page.
For multi-page printing, the Align rows option ensures that rows on each page start at the same height, so content continues seamlessly across pages.
Page Header/Footer
When enabled, the printout includes the project name, print date, name of the person who printed it, and the page number.
Repeat Headers
When enabled, the table header (column titles) is repeated on every printed page.
-
Click Print when your settings are complete.
-
Your PC/printer settings will open.
Set the paper format, layout, and header/footer options again in the printer dialog, as InLoox only controls the planning layout — not the printer settings.
- Check the print preview and confirm with Print when everything looks correct.