Mind Maps
Visually collect and organize your ideas in mind maps using nodes. This gives you an overview of all ideas, concepts, and drafts.
When creating a mind map, we distinguish between two approaches:
- Plan-based approach: The main nodes of the mind map correspond to the project phases (top-down).
- Task-based approach: The main nodes of the mind map correspond to the tasks of the project (bottom-up).
Create a mind map
To create a mind map, follow these steps:
-
Open an existing project or create a new one.
-
Click on the Mind Maps tab, then click the blue New Mind Map button.

-
By default, your mind map has the same name as the project. You can change the name by clicking the three vertical dots on the right and then clicking Rename Mind Map.

-
The main node is automatically placed in the center of a new mind map. By default, it also uses the project name. You can change it by double-clicking.
-
Create a sub-node by clicking the plus icon below the main node.

-
By default, the new node is created as a child node of the currently selected node. Name the node and press Enter or click somewhere outside the node.

-
Create as many nodes as you like. Right-click a node to add parent or sibling nodes.

-
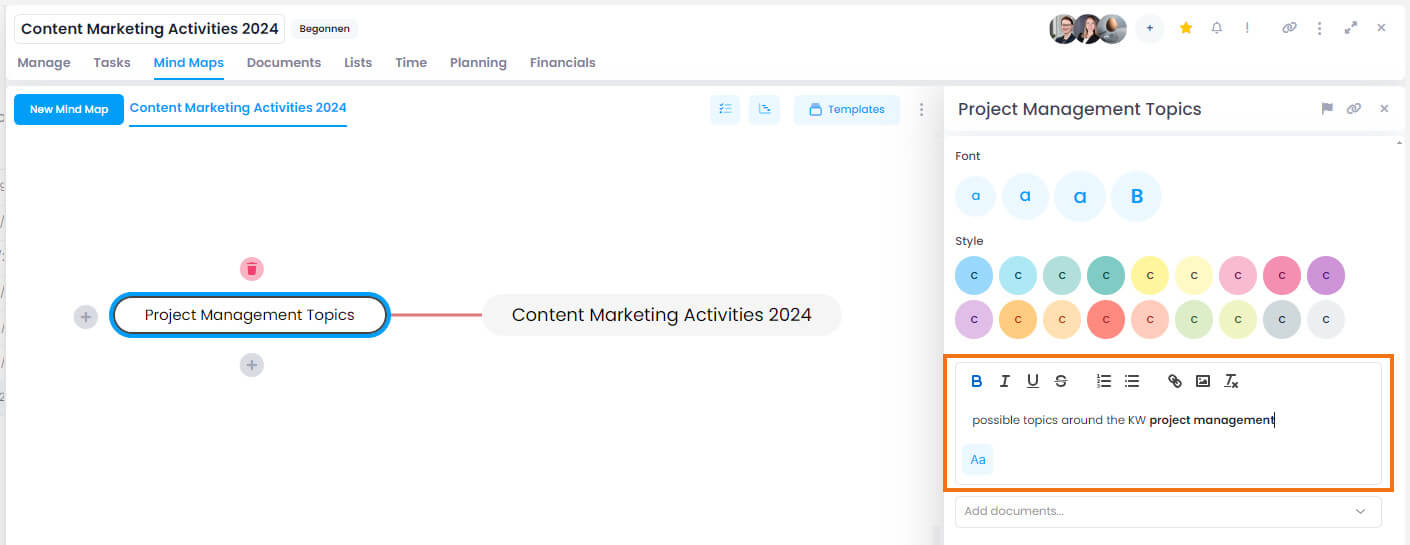
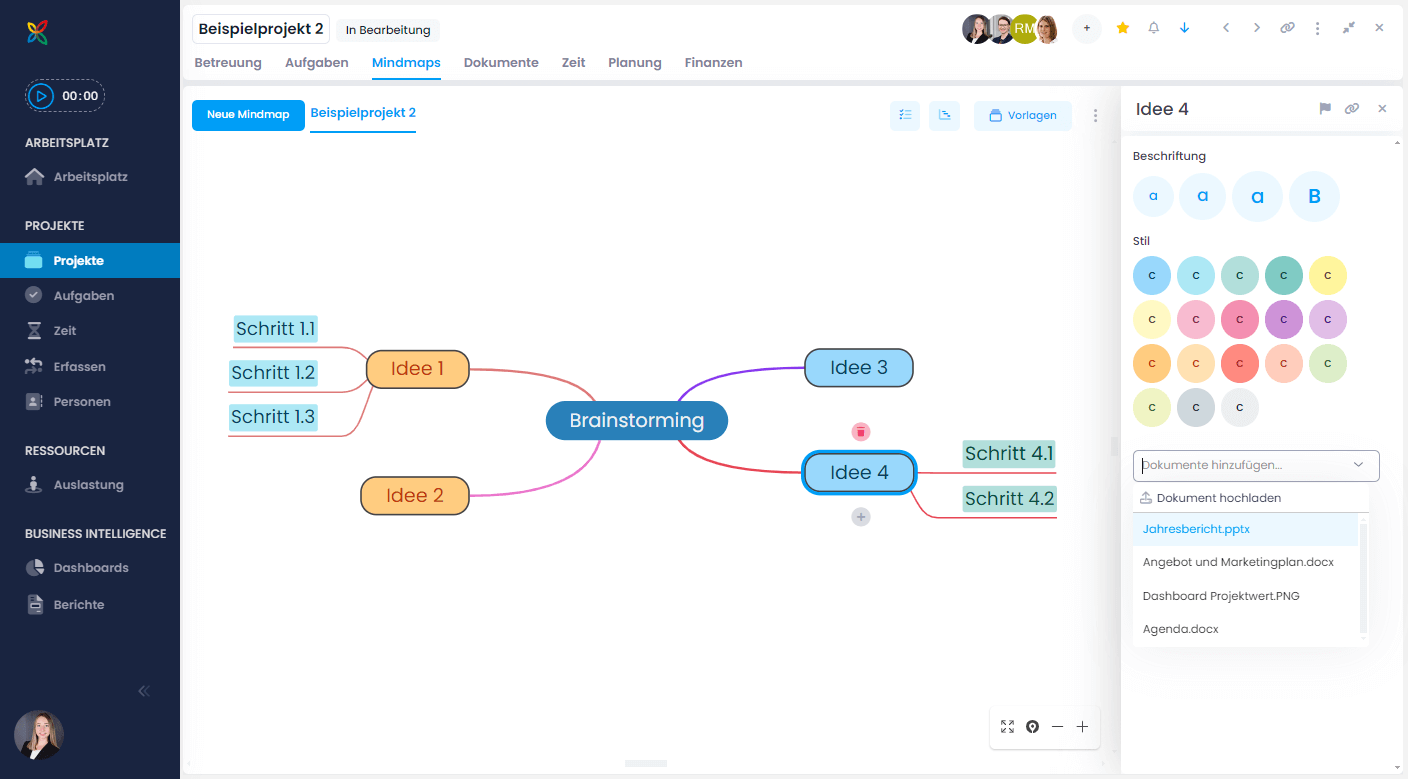
Give your mind map a colorful look by changing the background or font color of your nodes. Select a node and choose a color in the side panel on the right. You can also adjust the font size, write a description text, or add documents to nodes (drag and drop is also supported).
-
Since InLoox 11.18, you can use the Linked Items feature to connect a mind map node to relevant items from the current or other projects — such as tasks, documents, time entries, budgets, or planning elements. The links are bidirectional, allowing you to jump directly to the connected content at any time.
-
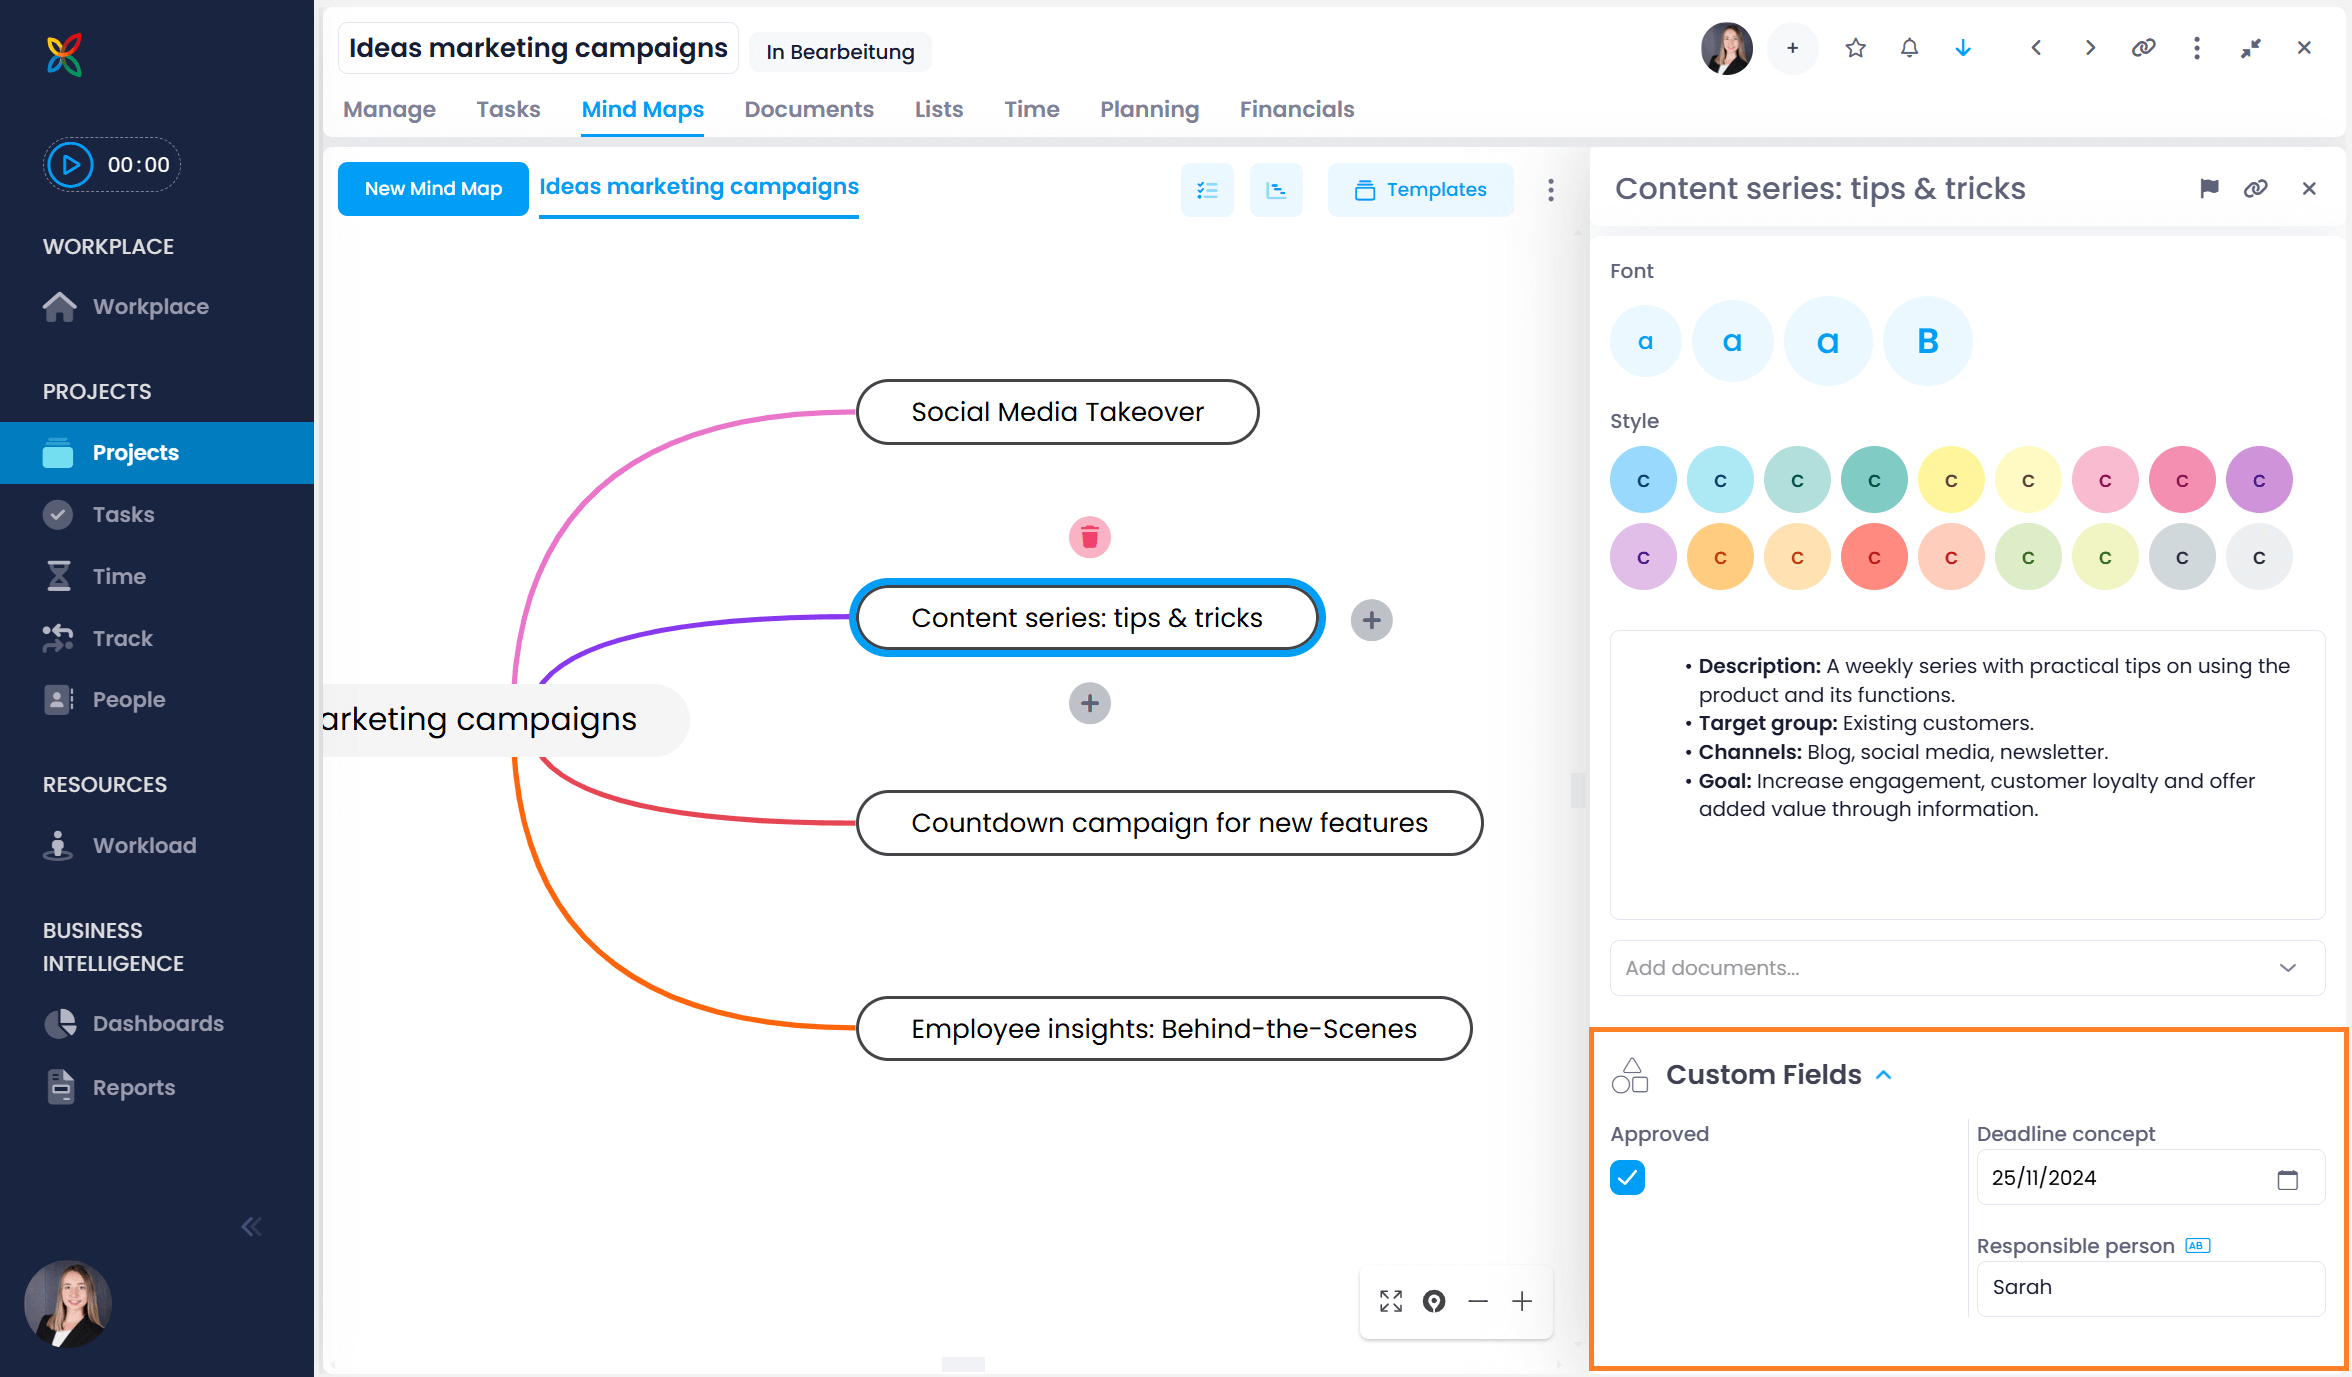
Since InLoox 11.15, you can also use custom fields in mind map nodes. These are defined in the InLoox account settings. Learn more in the custom fields help article.
Mind map templates
If you use certain mind map frameworks frequently, it makes sense to save them as templates. Saving your individually designed mind maps to your personal template collection allows you to reuse them quickly and effectively across different projects.
How to save a mind map as a template
-
Open an existing mind map.
-
Click the blue Templates button at the top right, then click Save Mind Map as Template.

-
Give the template a name in the dialog box and click Save.
-
The saved template appears under the Templates button and can be opened at any time.
Under Manage Templates, you can rename, delete, and export templates.
Create tasks from a mind map
You can create tasks from existing nodes in a mind map. This lets you seamlessly transition from conceptualization to actual implementation without having to create tasks manually.
This procedure is particularly suited for the task-based approach, where the nodes of the mind map correspond to the tasks in the project.
If the nodes of your mind map correspond to planning phases, read how to copy a mind map to the planning instead.
Steps
-
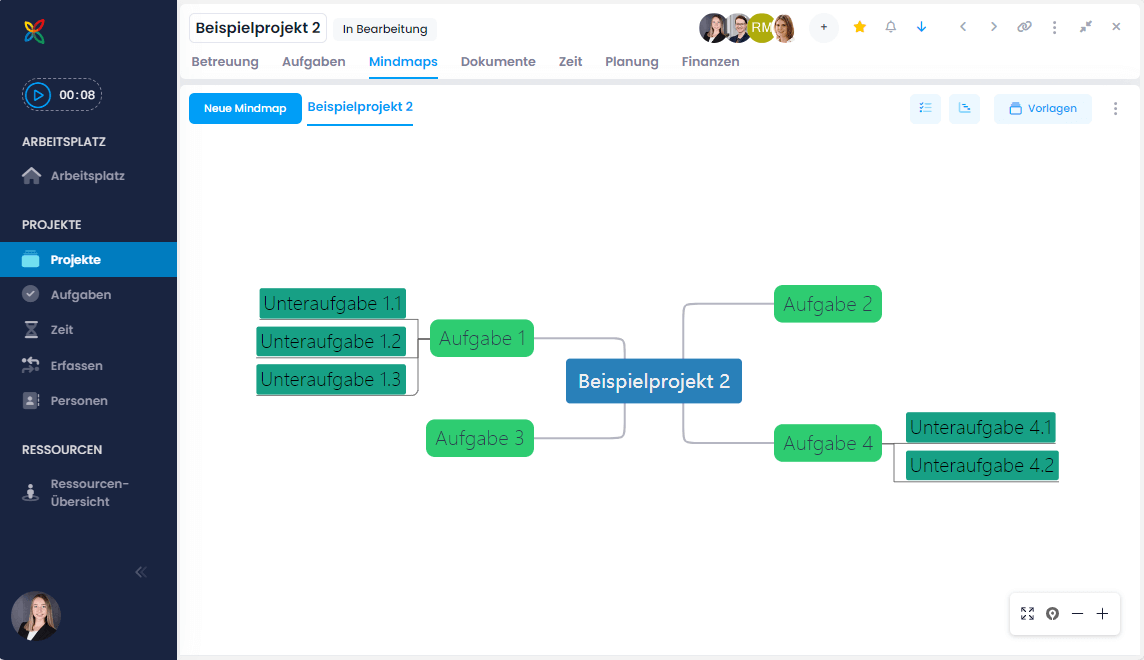
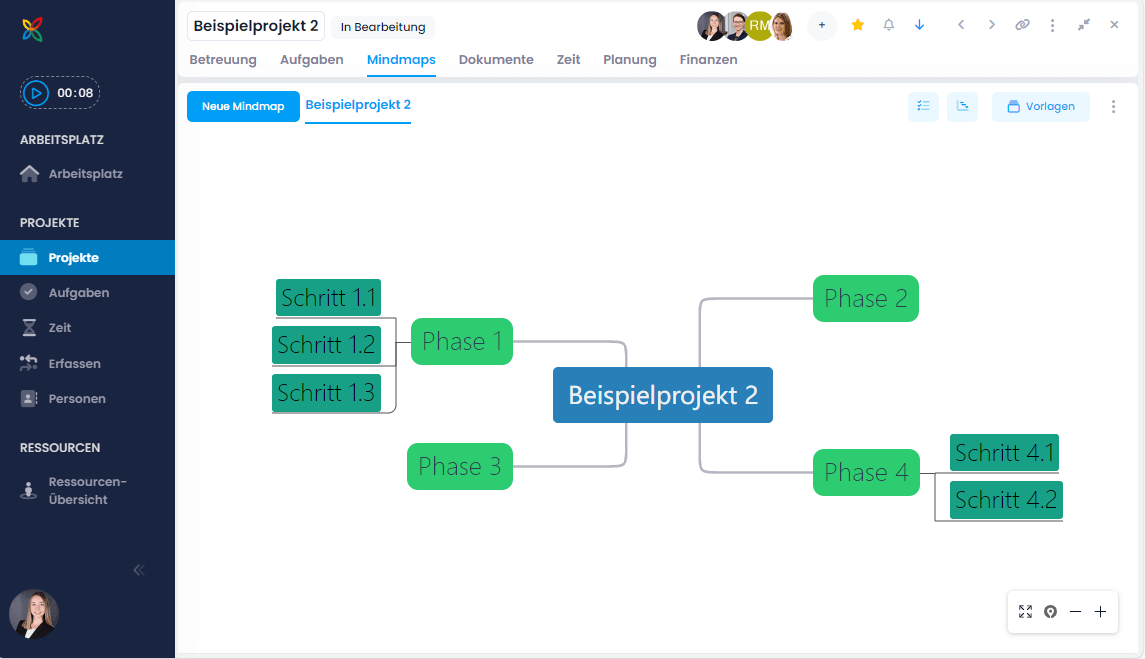
Open an existing mind map. Our example looks like this:
-
Click the button at the top right that represents a task list.

You now have two options:
- Copy New Nodes to Tasks: Tasks are created from all nodes of the mind map, including the main node.
- Copy New Leaf Nodes to Tasks: Tasks are created only from the end nodes (leaf nodes) of the mind map.
-
After selecting the desired option, the corresponding nodes are automatically created as tasks.
-
In our example, we selected Copy New Nodes to Tasks. In the task overview Kanban board, you can now see the new tasks in the leftmost column "To Do."
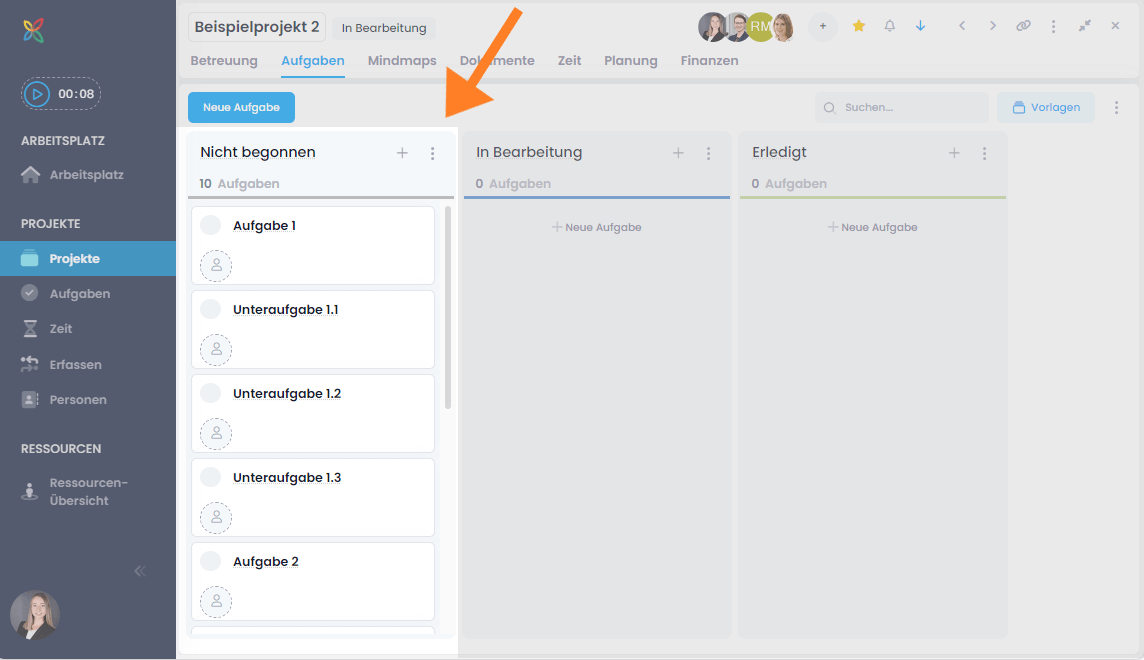
You can continue working on your mind map and transfer newly added nodes as tasks at any time. Thanks to InLoox's intelligent synchronization, nodes that have already been transferred are recognized and not transferred again — avoiding duplicate entries.
Copy a mind map to the planning
To seamlessly transform your creative ideas from mind maps into concrete project plans, you can copy the structure of a mind map into the planning.
This is particularly suited for the plan-based approach, where the nodes of the mind map correspond to the planning phases in the project. When you transfer the mind map to the planning, each node is converted into an activity.
Steps
-
Open an existing mind map. Our example looks like this:
-
Click the button at the top right that represents a Gantt chart.

-
The planning view opens. The following rules apply:
- The nodes of your mind map are automatically displayed as activities in the planning.
- A summary activity is created from the main node (the central node in the mind map).
- Sub-nodes are grouped as additional summary activities under the parent node.
- The default duration is 1 day per activity.
Our example mind map now looks like this in the planning:
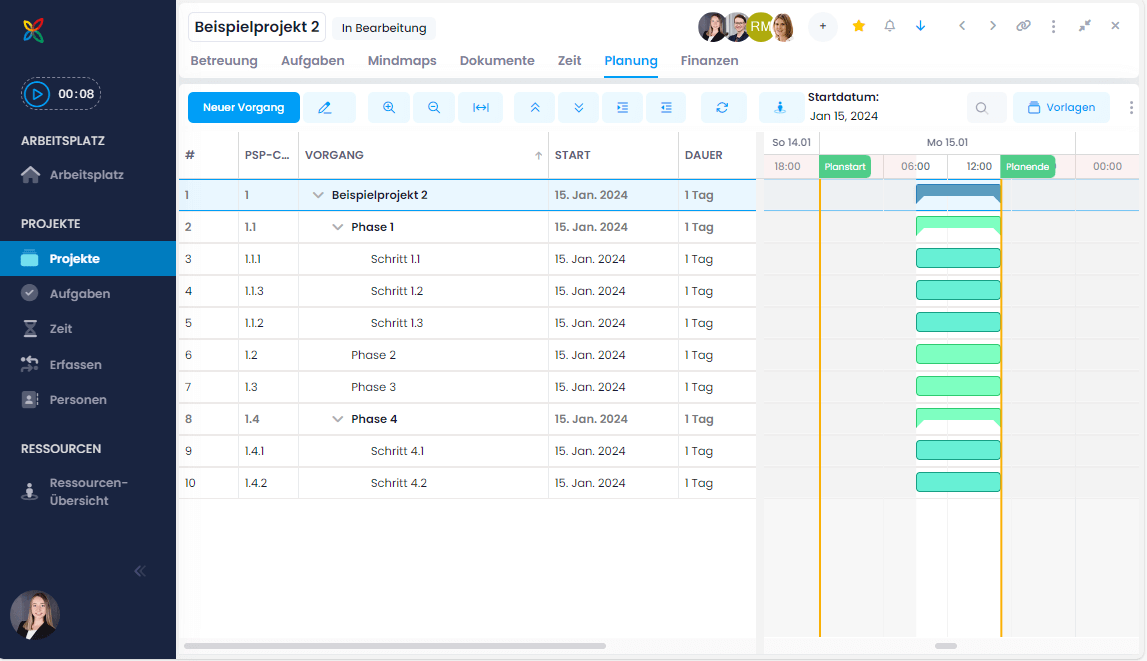
You can — and should — adjust all details individually to refine the planning.
Learn more about planning in the Project Planning help article.