Custom Fields
Custom fields are an easy way to individualize your InLoox account. You can create custom fields for:
- Projects
- Tasks
- Mindmap nodes
- Planning
- Time
- Documents
- Risks
- Financials and (Budget) Line Items
- People
You can select from the following types of custom fields:
- String — for text
- Datetime — for dates
- Integer
- Decimal
- Boolean — for checkboxes
- List
- Currency
Key behaviors:
- By default, a custom field is always visible. You can set a specific display rule to control when it appears.
- By default, a custom field is unlocked for editing. You can enable write protection to restrict who can edit it (available since InLoox 12.4).
- By default, a custom field is optional. You can make it mandatory so that users are warned when it's left empty (available since InLoox 12.4).
To create custom fields, you must have admin permissions for your InLoox account. Custom fields are only available in the InLoox Enterprise, InLoox Enterprise Plus, and InLoox Self-Hosted editions.
How to create a new custom field
- In InLoox Web App, click on your profile picture in the upper-right corner.
- Click on Account Settings.
- Click on Custom Fields.
- Select the InLoox section where the custom field should be displayed (e.g., the manage page of the project).
- Click the New button to open the editing window.
- Type in the name of the custom field.
- Select the type from the drop-down menu.
- Click Save. The custom field is created and is "always visible" by default.
How to set a display rule for a custom field
After creating the custom field, you can set a specific rule for when it should be displayed:
-
Click on "Always visible" to open the Set Display Rule editing window.
-
Select a dataset for the rule, e.g., Client name.

-
Enter a regular expression for the rule, e.g.,
XYZ Corporation. Use the Test field to validate your expression. For more complex patterns, try regex101.com.
To create custom fields for personal tasks without a project context, create the custom field in the Task Item tab and set a rule for the Project Name field using the expression: ^null$
The custom field will then automatically appear for all personal tasks that are not part of a project.

How to edit or delete a custom field
You can edit the Name, Default Value, and Rule of an existing custom field by clicking on it. You cannot change the type of an existing custom field.
To delete a custom field, click the trash can icon next to it and click Delete to confirm.
Searching custom fields of the type List
Since InLoox 11.14, you can search through existing custom fields of the type List — particularly useful for accounts with many list entries.
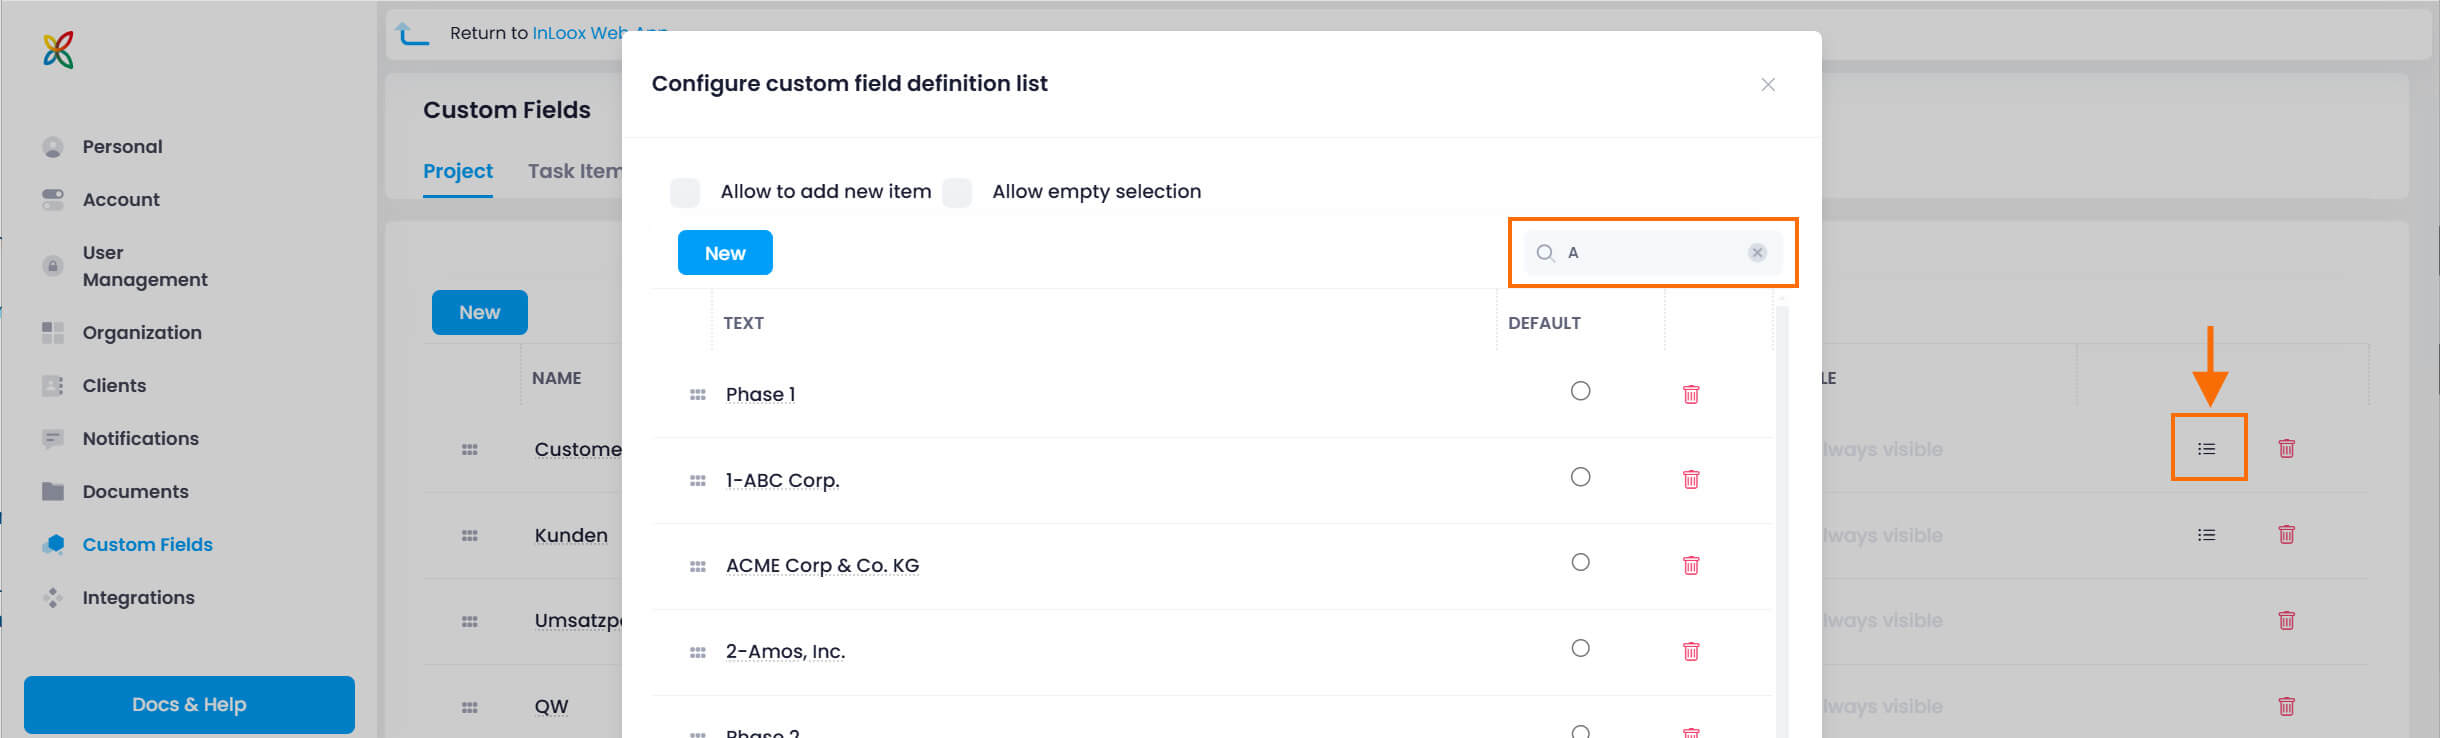
- In the InLoox Settings, click on Custom Fields and select an InLoox area (e.g., Projects).
- Click on the list icon to open the List-type custom field for editing.
- Enter the name of the list entry you are looking for in the search field at the top right.
How to enable write protection for custom fields
Custom fields can be locked for editing. You can enable write protection individually per custom field and define who can edit it:
- All users with editing permissions for the section where the custom field was created (e.g., document editing permission = permission to edit custom fields in Documents).
- Users with a specific role (e.g., only "project manager" role holders can edit a particular custom field).
- A specific person assigned to the custom field.
Steps:
- Go to Account Settings and click on Custom Fields.
- Select the section and click New to create a custom field.
- Enter the name and select the type, then click Save.
- Click the unlocked symbol next to the custom field.
- In the Enable write protection window, define who can edit this field.
- Click Save.
To modify the setting later, click the locked symbol again.

How to make custom fields mandatory
By default, custom fields are optional. To make a field mandatory, check the "Warn if empty" box. Users will see a red notification alerting them to fill in the required field.
