Invite People to InLoox Web App
There are several ways to invite people to InLoox:
Option 1: Via Your Profile
Click on your own profile picture in the lower-left corner and click Invite User.

A dialog opens where you enter the name and email address of your colleague.
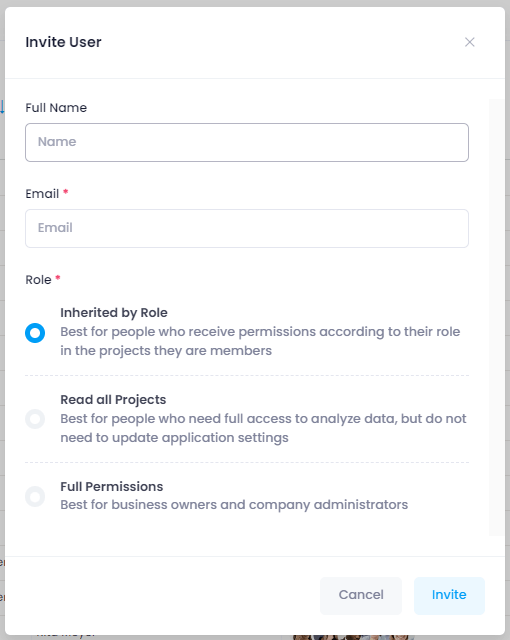
You also need to select a role. You can choose between:
- Inherited by Role: Best for people who receive permissions according to their role in projects (e.g., Manager, Team Member, etc.)
- Read all Projects: Best for people who need full access to analyze data but do not need to update application settings
- Full Permissions: Best for business owners and company administrators
Option 2: Via the People Section
To invite colleagues via the People section in InLoox Web App, you first need to create a contact for them. Click the New contact button and enter the appropriate data.
Once the contact is created, select it in the contact list. In the side panel that opens, click Invite and select a role.

The person will receive an email invitation with a corresponding link to accept it.
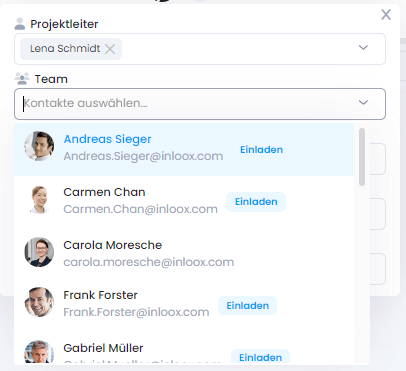
Option 3: Directly in a Project
You can also invite people directly in a project. When adding members to the project, simply click the Invite button next to the person (provided a contact already exists for them).
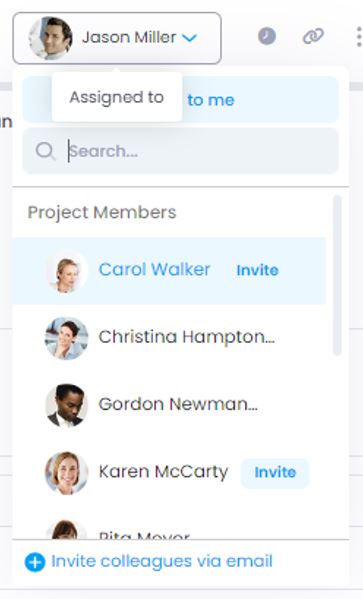
Option 4: Via Task Assignment
You can invite people directly within a specific task. Select the task the person should be responsible for, then click the Assign task to button. Instead of selecting a person as usual, select Invite colleagues via email from the drop-down menu at the bottom. Enter the corresponding email address to invite the person.
In order for the invited person to start working with InLoox Web App immediately, you need to grant them a license and the corresponding permissions. Go to InLoox Account Settings → User Management, click on the person's name, and set the access to Read & Write. In the Global tab on the right, you can configure user-based permissions. For example, to give the person full access to explore InLoox Web App, grant them all rights plus administrator rights.
A contact card is also created for the invited person automatically, so you can immediately assign tasks or project roles to them.
During the 30-day trial, you can invite up to 4 additional people to InLoox Web App.