Edit, Assign, Approve, and Delete Financial Plans
Financial Plan Actions
- Change name: Click on the name of the plan and type in a new name.
- Change status: By default, every financial plan is set to Open. You can change the status to Approved or Rejected.
- Assign a financial plan: You can assign each financial plan to a person. Click on the person icon and click Assign to me if you are responsible for the plan. Alternatively, select another person or use the search field.
- Delete a financial plan: Click on the three-dot menu in the plan and select Delete plan to remove it. Confirm the action by clicking Delete.
Line Item Actions
- Reorder entries via drag-and-drop: Drag an entry to the desired position. InLoox automatically reassigns the item number.
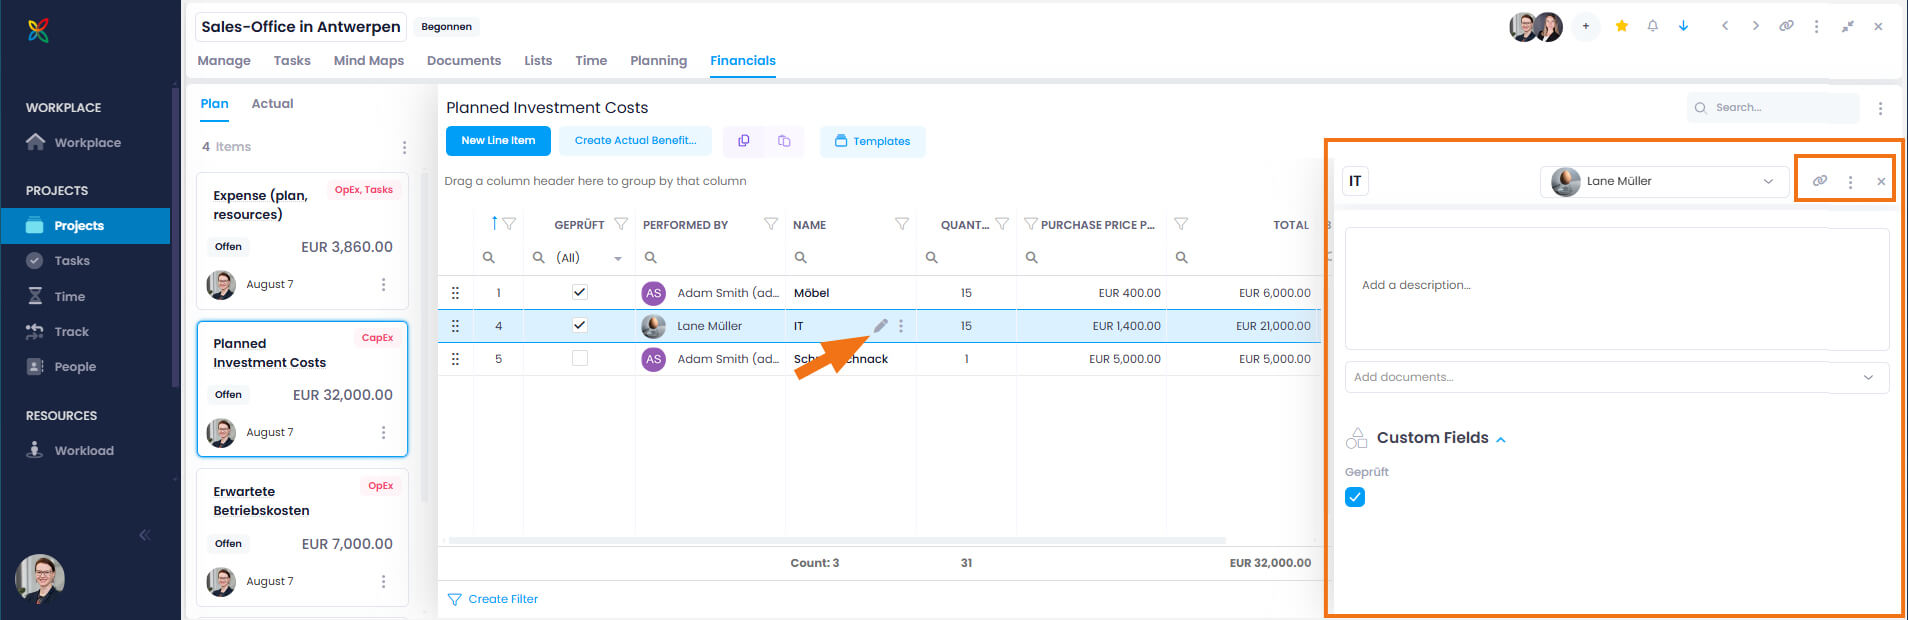
- Edit data fields: Double-click to edit data inline. Or click the edit icon (pen symbol) to open the side panel, where you can:
- Rename the line item
- Change the resource allocation
- Add a description and documents
- Change the quantity, unit, or sales and purchase prices
- Use custom fields for budget line items
- Copy the link to this line item
- Delete the line item
- Delete entries: Select an entry, click the three-dot menu in the Name column, and then click Delete entry. Confirm by clicking Delete. You can also delete the entry from the side panel.
info
Using the Linked Items feature, you can connect the budget line item to relevant items from the current or other projects in InLoox — such as tasks, time entries, mind map nodes, or planning elements. The links are bidirectional, allowing you to jump directly to the connected content at any time.
Column Actions
- Remove or add columns: Select the financial plan and click the three-dot menu on the right-hand side. In the Actions menu, click Select columns and drag the required columns into or out of the list.
- Custom fields created in the settings for budget items can also be displayed as columns since InLoox 11.13.
- Filter columns (Advanced Mode): Once you have switched to Advanced Mode, use the filter icon to filter column data.
- Group by columns (Advanced Mode): Once you have switched to Advanced Mode, drag a column into the field above the list of entries to group the entire list by that column.