Create Planned Benefits in the Project
tip
Read the articles Financials Overview and Fundamental Data for Financial Plans before you start creating expense and benefits plans.
To create a new benefits plan, follow these steps:
- In the project, click on the Financials tab. Under Planned, you will find a three-dot menu.
- Click on the three-dot menu and select Add Benefits Plan.
- InLoox creates the expected benefits. Select the benefits plan.
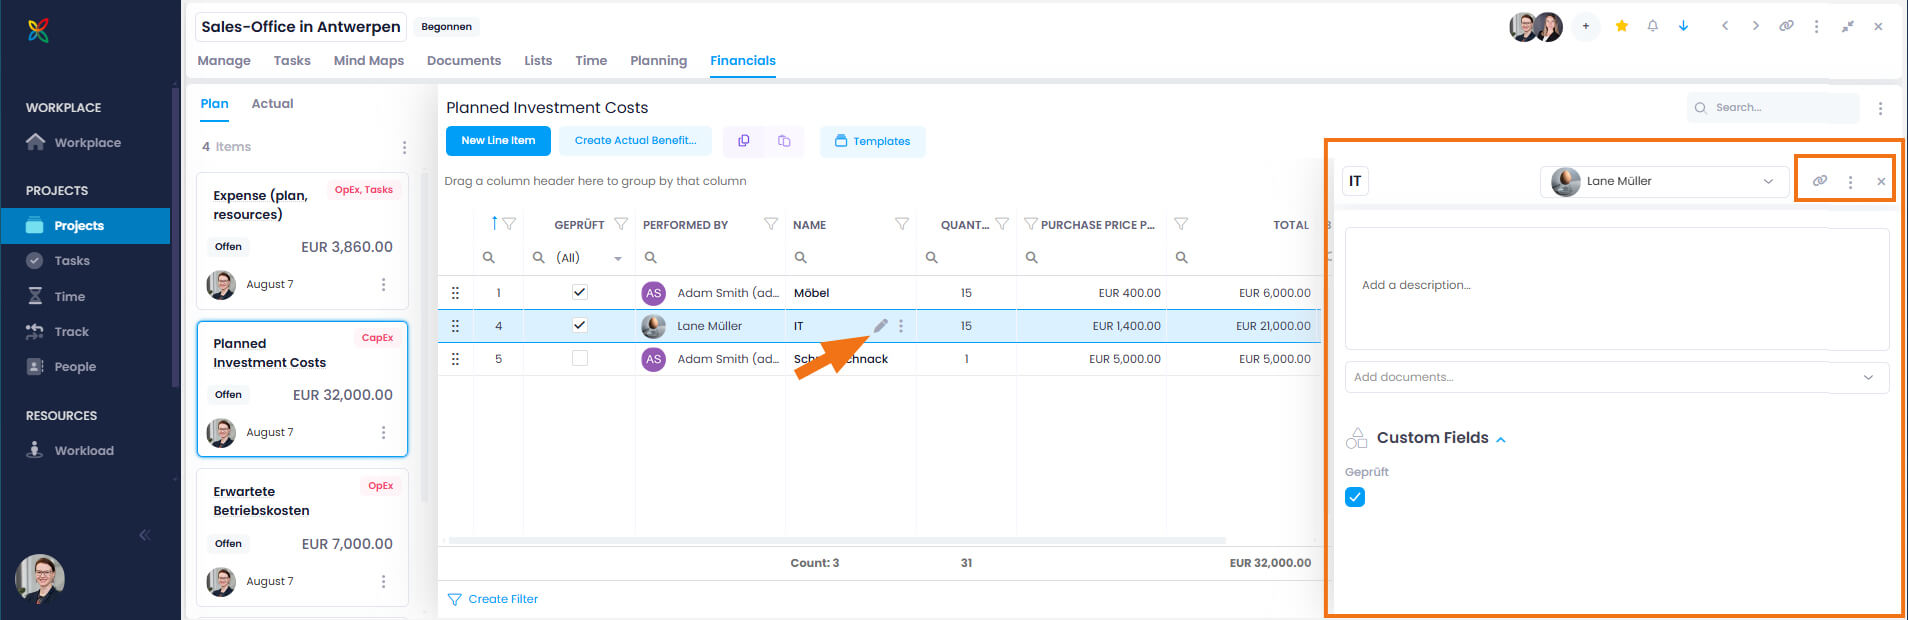
- Click New Line Item and edit it by double-clicking on the individual data fields of the columns.
- Alternatively, you can copy and paste an existing item. Select the entry, click the purple copy icon, and then the purple paste icon
 . This feature has been available since InLoox 11.14 (September 2024).
 - To edit the data fields of the new item, double-click directly in the respective field. Alternatively, click the edit icon (pen symbol) to open the side panel, where you can:
- Rename the line item
- Change the resource allocation
- Add a description
- Add documents
- Change the quantity, unit, or sales and purchase prices
- Use custom fields for budget line items
- Copy the link to this line item
- Delete the line item
info
Using the Linked Items feature, you can connect the budget line item to relevant items from the current or other projects in InLoox — such as tasks, time entries, mind map nodes, or planning elements. The links are bidirectional, allowing you to jump directly to the connected content at any time.