Track (InLoox 12)
This article covers the Track features available only for InLoox Self-Hosted Edition 12.5.1 or earlier. For newer versions, see the Email Tracking article.
The Track function in InLoox allows you to turn Outlook emails into tasks or documents, and to track calendar entries as time entries — all directly from within InLoox.
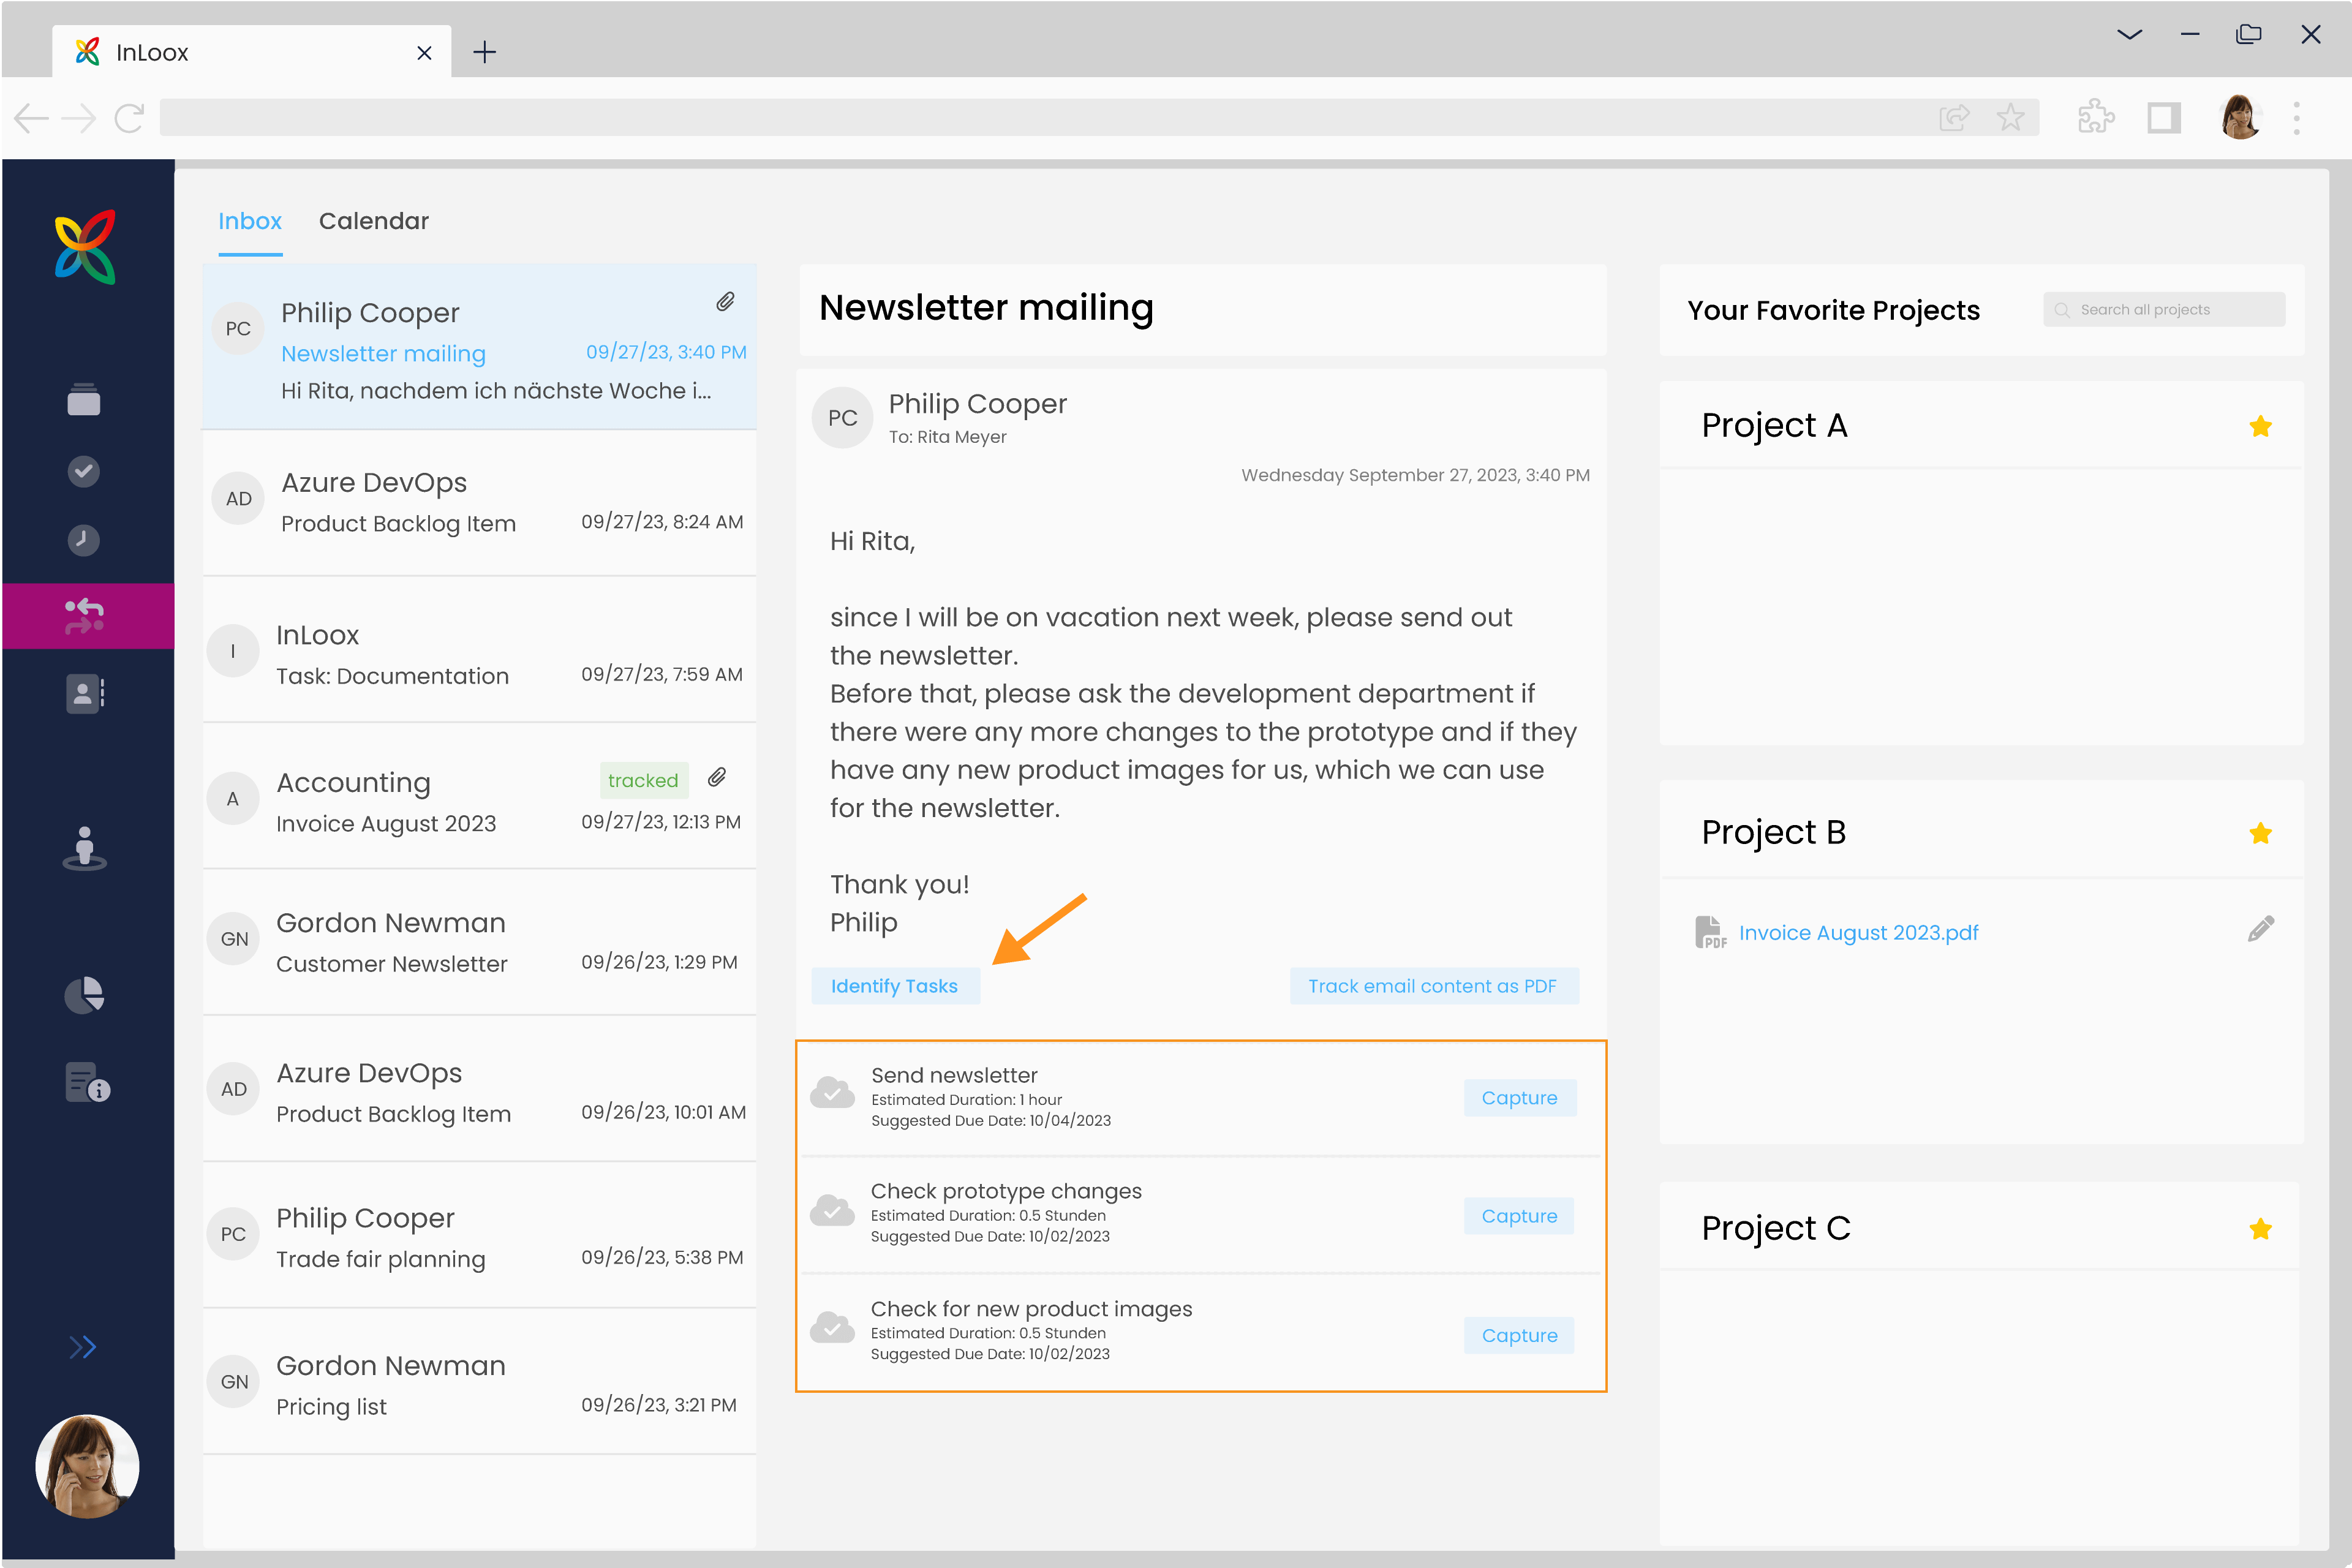
Turn Emails into Tasks with AI
- Microsoft 365 connection active
- Permission Show inbox in InLoox enabled
- InLoox AI Assistant activated
This feature requires enabling the InLoox AI Agent under InLoox Account Settings >> Organization >> Privacy Settings. Not available in Self-Hosted edition.
- Open the Track section in InLoox.
- Select an email from the inbox.
- Click Identify Tasks. The AI Assistant analyzes the email and suggests tasks.
- Review the suggested tasks and click OK next to a task to create and edit it.
- Repeat the process if the email contains multiple actionable items.
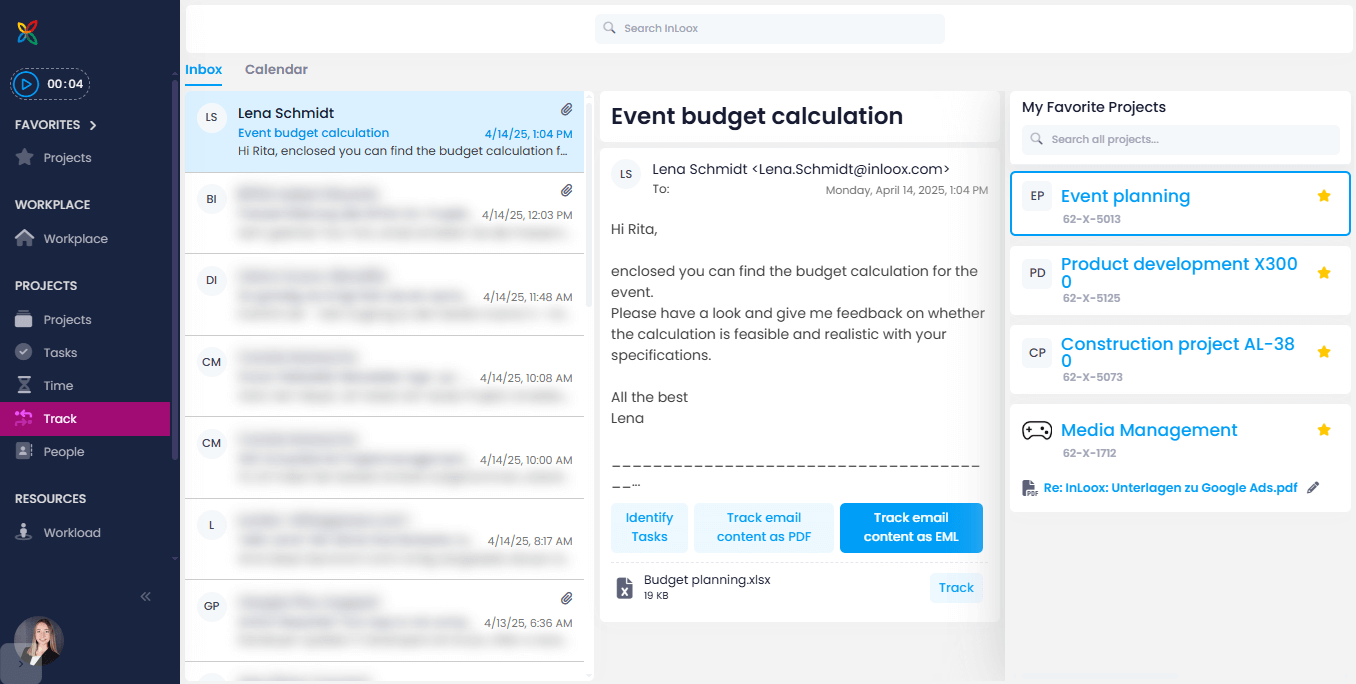
Turn Emails into Documents
You can file emails and their attachments as documents in an InLoox project. Emails can be saved in EML or PDF format.
- Microsoft 365 connection active
- Permission Show inbox in InLoox enabled
Filing an Email as a Document
- Open the Track section in InLoox.
- Select an email from the inbox.
- Click Track in the toolbar.
- Select the target project.
- Choose a document category (optional).
- Select the format: EML or PDF.
- Confirm the action. The email is saved in the project's Documents section.
Moving a Filed Document to a Folder
After filing, you can organize the document into a specific folder within the project's document structure.
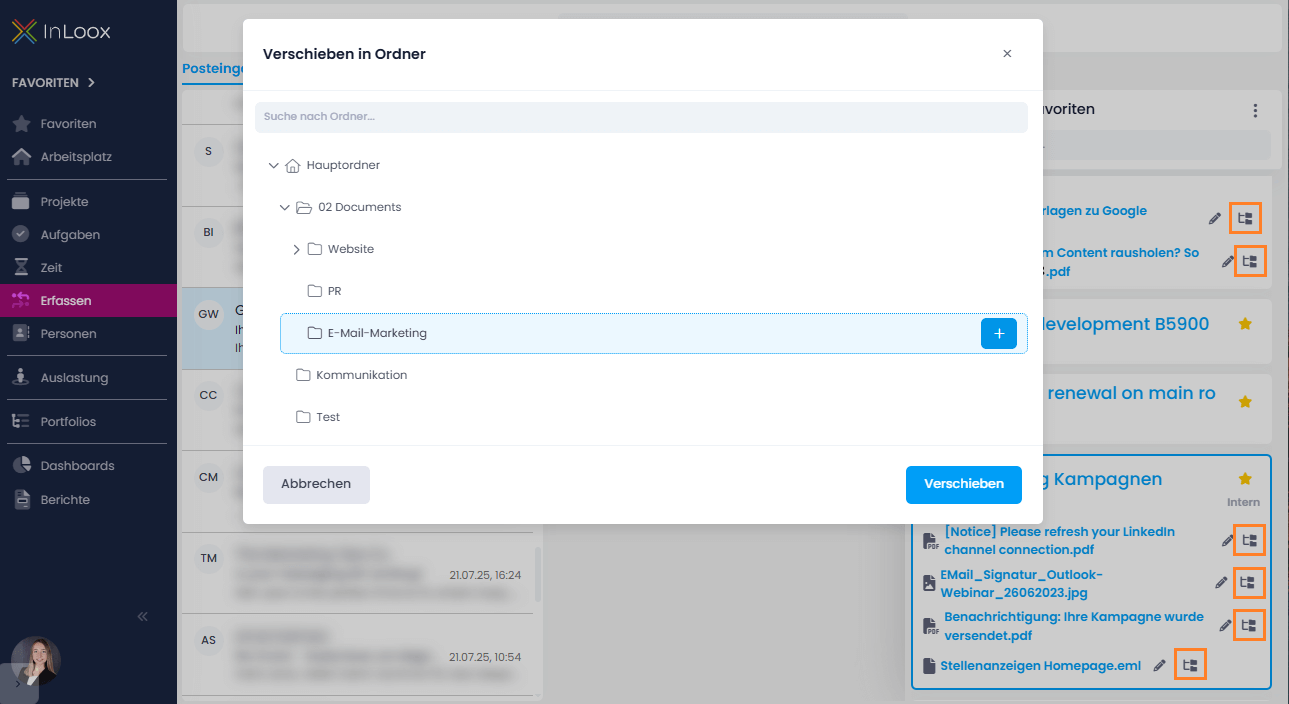
Emails filed as PDFs cannot be automatically tracked. Automatic tracking only works with the .eml format.
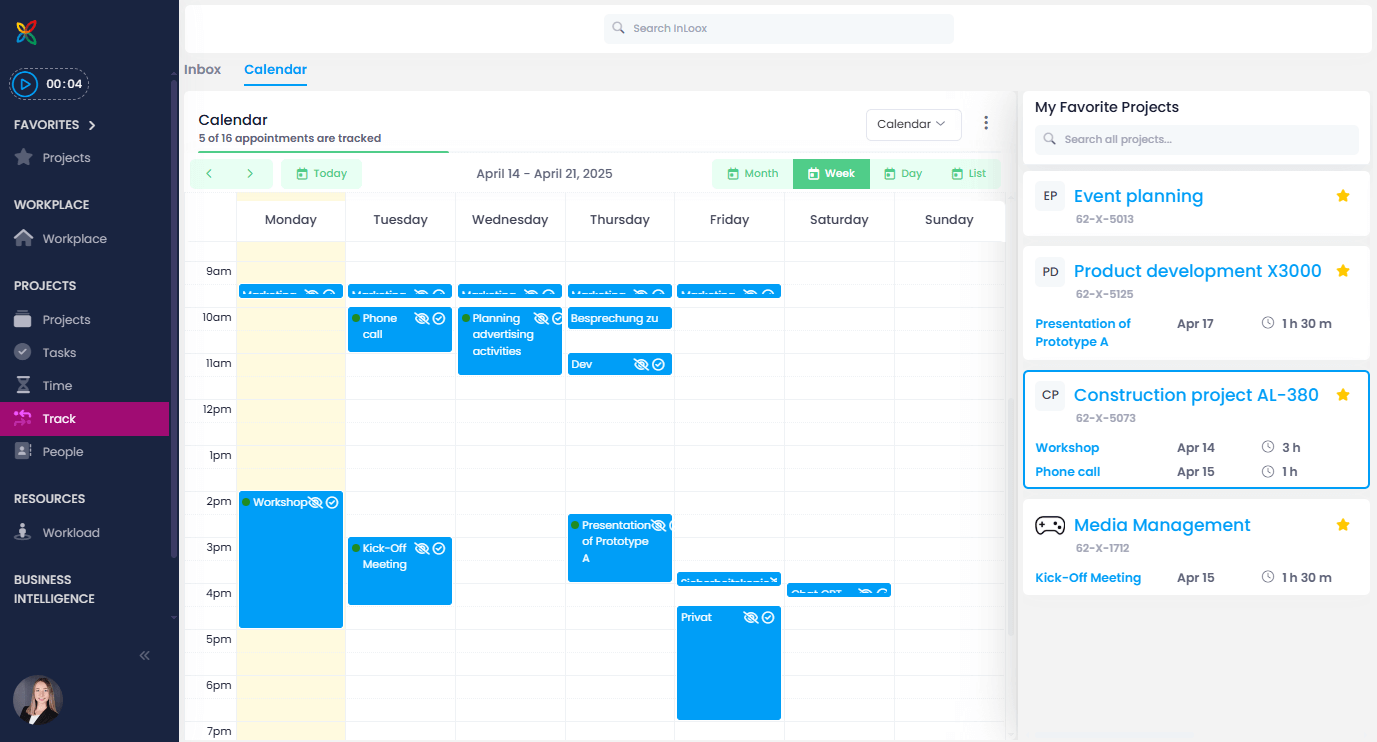
Track Calendar Entries as Time Entries
You can track Outlook calendar entries as time entries in InLoox to record effort spent on project activities.
- Microsoft 365 connection active
- Permission Show inbox in InLoox enabled
- Open the Track section and switch to the Calendar view.
- Select a calendar entry.
- Click Track to assign it to a project.
- Choose the target project and optionally assign a task or work package.
- The calendar entry is recorded as a time entry in the project.